Pavers in Nabnasset, MA

Outdoor Surfaces Built to Last Decades

Professional paver installation that handles New England weather without cracking, settling, or disappointing you.

A scenic suburban house surrounded by lush greenery, featuring a curved driveway in the foreground. The property has manicured lawns, shrubs, and trees. The house exterior is grayish with multiple gables and large windows, showcasing a well-maintained residential landscape.
A construction worker wearing a gray shirt and blue overalls stacks concrete blocks in a step-like formation. The worker is wearing protective gloves. In the background, additional stacked bricks and a partially visible stone wall can be seen. The image highlights careful masonry work and organization of materials at a construction site.

Paver Installation in Nabnasset

Outdoor Living That’s Truly Usable

You want a patio that doesn’t buckle after the first winter. Something that drains properly when it rains and doesn’t turn into a weed garden by summer’s end.

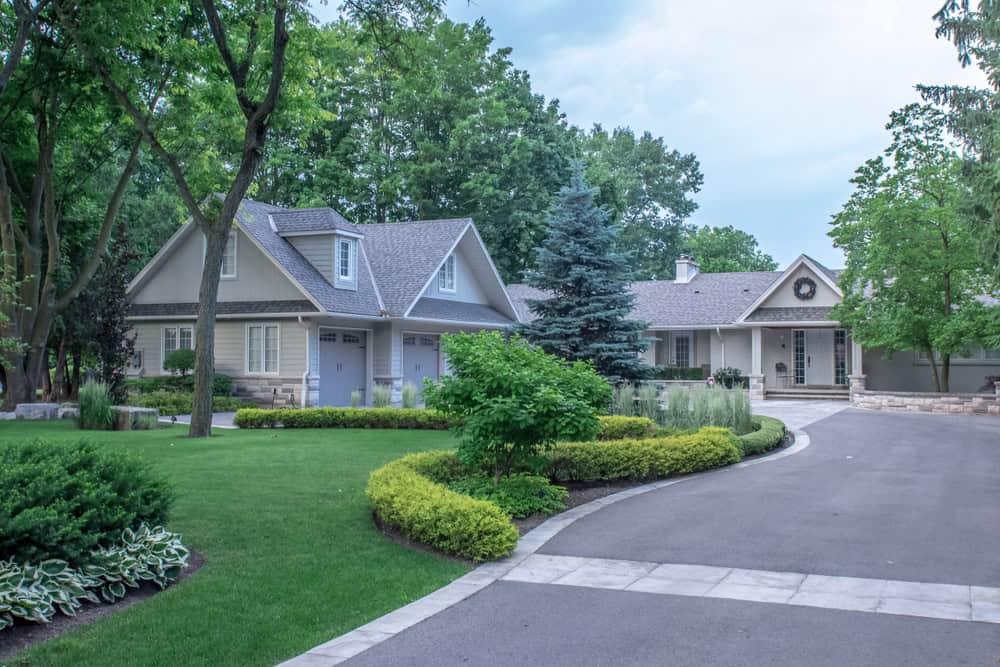
That’s what proper paver installation provides. A surface that stays level, properly sheds water, and looks the same five years from now as it does the day we finish.

No more dealing with cracked concrete or uneven stones that catch your heel. Just a clean, stable outdoor space you can use for grilling, entertaining, or just sitting outside without worrying about tripping hazards or water pooling around your foundation.

Brick Paving Contractors in Nabnasset

Paving Solutions That Suit Massachusetts Soil

As local paving contractors, we’ve been installing pavers in the Nabnasset area long enough to understand what works and what doesn’t. Massachusetts soil shifts, freezes, and thaws, and can destroy poorly installed patios.

We’ve seen the damage that happens when contractors skip proper base preparation or use the wrong materials for our climate. That’s why we focus on the foundation work that most people never see but makes all the difference in how your patio performs over time.

Local, licensed, and insured. We handle permits, follow local codes, and warranty our work because we plan to be here when you need us.

A neatly arranged driveway made of grey pavers, featuring a central strip filled with white gravel and lined with green shrubs. Modern lamp posts are evenly spaced along the strip, guiding the way to a white garage door. The image highlights elegant landscaping design and careful paving work in a residential setting.

Our Paving Installation Process

How We Install Pavers Right

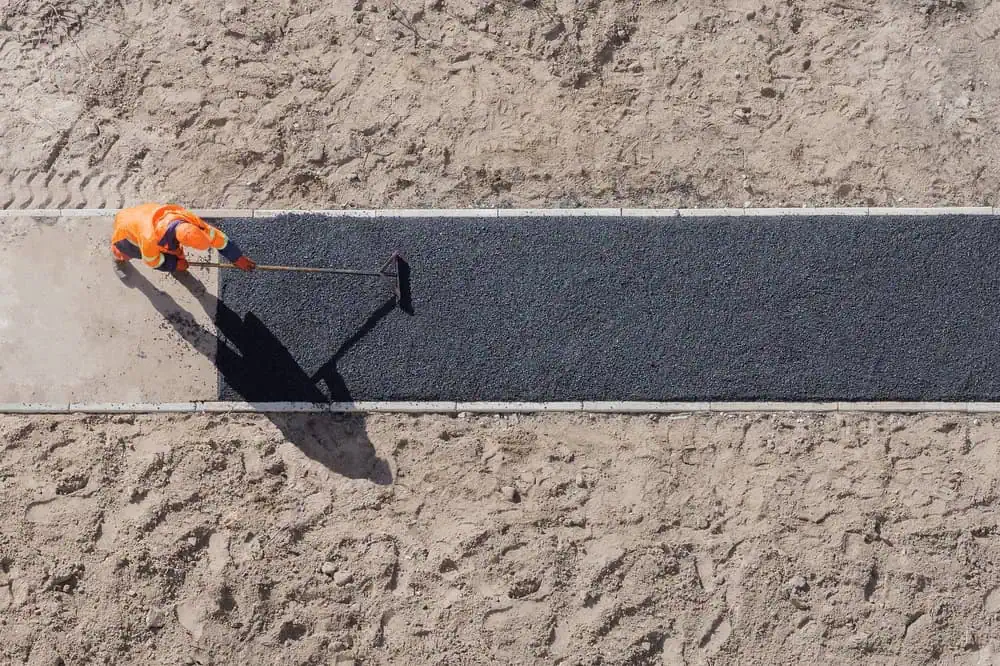
First, we excavate to the proper depth and grade for drainage. Most paver failures start with inadequate base preparation. We remove enough soil to accommodate the base materials and ensure water flows away from your foundation.

Next comes the base layer; compacted gravel that creates the stable foundation your pavers need. We use mechanical compaction equipment, not just hand tamping, to create a solid base that won’t settle over time.

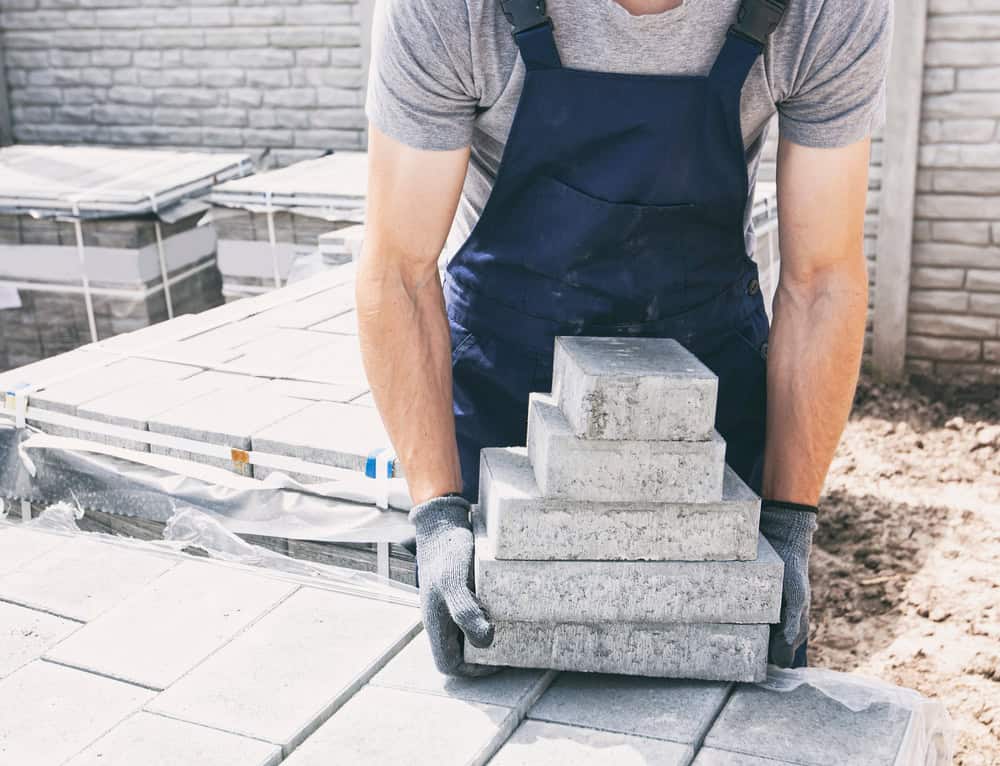
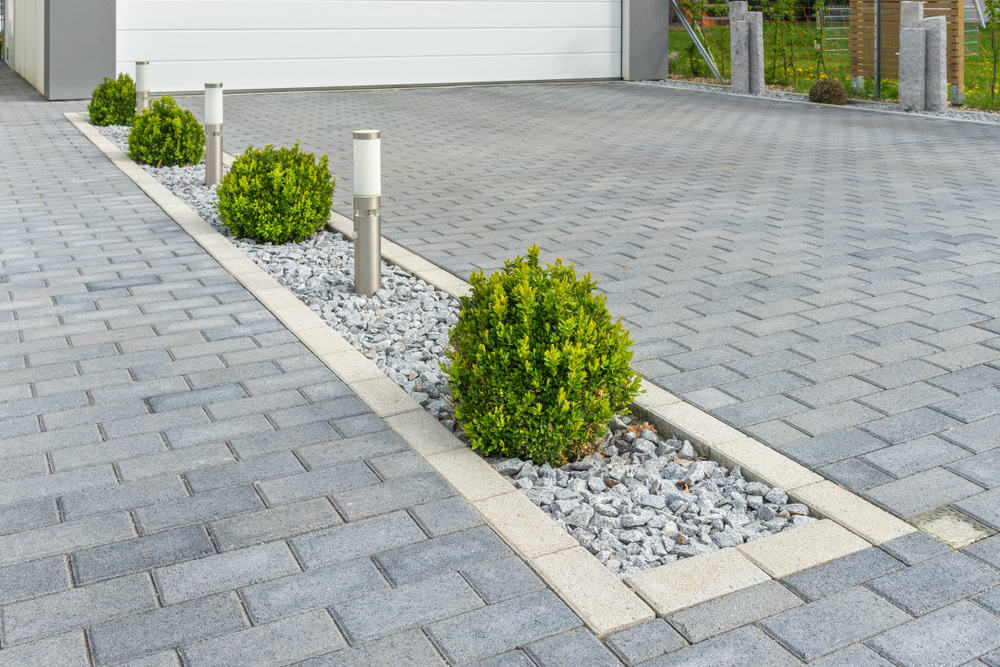
Then we install edge restraints to prevent pavers from shifting, lay the bedding sand, and set each paver by hand. Finally, we sweep joint sand into the gaps and compact everything one final time. The result is a patio that moves as one solid unit instead of individual pieces that can shift or settle.

A worker in an orange safety uniform is spreading asphalt on a path in a sandy area. They are using a tool to smooth the surface, with clear, defined borders of the freshly laid asphalt. Shadows fall across the path under the sunlight.

Ready to get started?

Explore More Services

About Academy Masonry and Construction

Get a Free Consultation

Patio Pavers in Massachusetts

What Your Installation Includes

Every paver installation includes proper excavation, engineered base preparation, and professional-grade materials rated for Massachusetts weather conditions. We handle all the details most homeowners don’t think about.

You get proper drainage grading so water moves away from your house, not toward it. Edge restraints that keep your pavers locked in place. Joint sand that prevents weeds and maintains stability. And compaction that ensures everything stays level.

We also handle permits when required and can work around existing landscaping, utilities, or other site challenges. The goal is a finished patio that looks clean, functions properly, and doesn’t create new problems for your property.

A construction worker wearing a gray shirt and blue overalls stacks concrete blocks in a step-like formation. The worker is wearing protective gloves. In the background, additional stacked bricks and a partially visible stone wall can be seen. The image highlights careful masonry work and organization of materials at a construction site.
Properly installed pavers typically last 20-30 years in Massachusetts with minimal maintenance. The key is correct base preparation and using materials rated for freeze-thaw cycles. Cheap installations often fail within 3-5 years due to inadequate foundation work, while professional installations with proper drainage and compaction handle our climate much better. The initial investment in quality installation pays off through decades of reliable performance without major repairs or replacement costs.
Pavers offer several advantages over concrete in Massachusetts. When soil shifts or settles, individual pavers can be lifted and releveled without replacing the entire surface. Concrete cracks and requires complete replacement when it fails. Pavers also provide better drainage through the joints, reducing ice formation and water damage. If repairs are needed, you can replace individual pavers rather than cutting and patching concrete. The modular nature of pavers makes them more resilient to our freeze-thaw cycles.
Proper base preparation is critical. We excavate to adequate depth, install a compacted gravel base, and use mechanical compaction equipment to create a stable foundation. Edge restraints around the perimeter lock pavers in place and prevent spreading. Joint sand between pavers creates friction that keeps individual pieces from moving. Finally, proper drainage grading ensures water doesn’t pool or undermine the base. Skipping any of these steps leads to settlement, shifting, and eventual failure of the installation.
Pavers require minimal maintenance when properly installed. Occasional sweeping and rinsing with a hose is all that’s needed for routine cleaning. You may need to add joint sand every few years as it naturally settles or washes out. Sealing is optional but can enhance color and provide stain protection. Snow removal is, as you can use ice melt products safely. If individual pavers become damaged or stained, they can be replaced without affecting the surrounding area. Overall, maintenance is much simpler than maintaining concrete or natural stone surfaces.
Paver installation costs vary based on material choice, site conditions, and project size. Basic concrete pavers typically cost less than premium natural stone options. Complex sites requiring extensive excavation or drainage work increase costs. However, the long-term value often exceeds the initial investment through increased property value and avoided replacement costs. We provide detailed estimates that break down material and labor costs so you understand exactly what you’re paying for. Quality installation costs more upfront but saves money over time through better performance and longevity.
Installing pavers over existing concrete is possible in some situations, but not always recommended. The existing concrete must be in good condition, properly sloped for drainage, and stable. Cracked or settling concrete will transfer those problems to the new paver surface. In most cases, removing the old concrete and installing a proper base provides better long-term results. We evaluate each situation individually and recommend the approach that gives you the best performance for your investment rather than just the cheapest short-term option.