Pavers in Milton, MA

Transform Your Outdoor Space With Professional Pavers

Custom paver installation that enhances your property value and creates lasting outdoor living spaces.

A scenic suburban house surrounded by lush greenery, featuring a curved driveway in the foreground. The property has manicured lawns, shrubs, and trees. The house exterior is grayish with multiple gables and large windows, showcasing a well-maintained residential landscape.
A construction worker wearing a gray shirt and blue overalls stacks concrete blocks in a step-like formation. The worker is wearing protective gloves. In the background, additional stacked bricks and a partially visible stone wall can be seen. The image highlights careful masonry work and organization of materials at a construction site.

Patio Pavers Milton MA

Outdoor Spaces Built to Last Decades

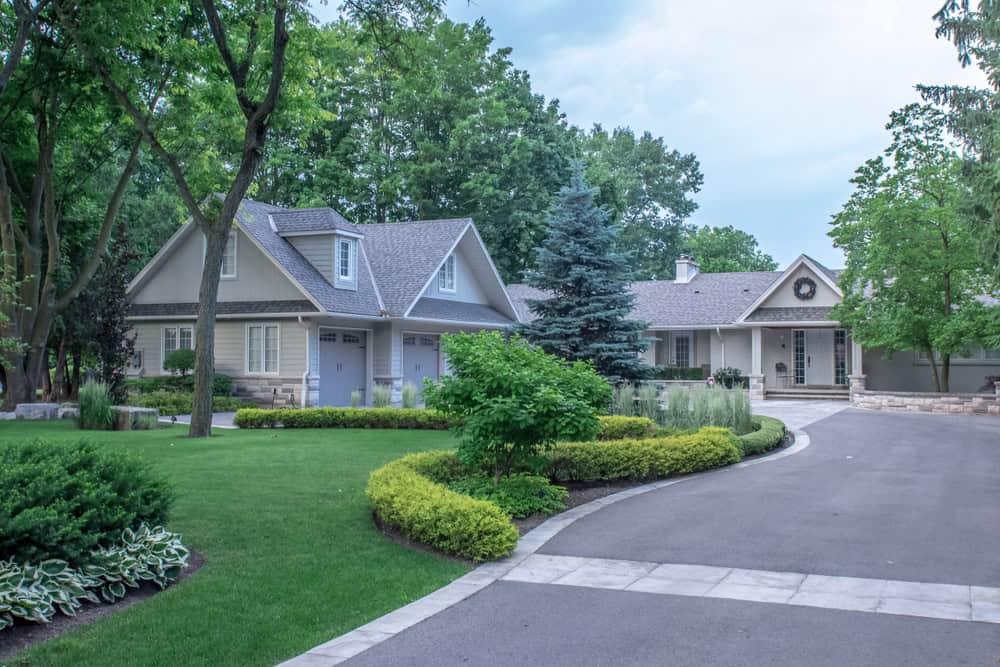
Your patio should be where memories happen, not where you worry about cracks and uneven surfaces. Professional paver installation gives you a space that handles everything from summer barbecues to winter freeze-thaw cycles without the headaches that come with concrete.

When pavers are installed correctly, you get immediate use of your space. No waiting weeks for concrete to cure or wondering if that hairline crack will turn into a major problem next spring.

The right paver installation also solves drainage issues that plague many Milton properties. Instead of dealing with standing water or ice patches, you get a surface designed to handle New England weather while looking better year after year.

Paving Contractors Milton MA

Milton Masonry Experts Since Day One

We’ve been serving Milton and surrounding communities with professional paving installation services. The local expertise matters when you’re dealing with New England soil conditions and weather patterns that can make or break a paving project.

Every paver installation starts with understanding your property’s specific drainage needs and soil conditions. This isn’t about following a generic template – it’s about building something that works with your land, not against it.

The difference shows up years later when your neighbors are dealing with repairs and you’re still enjoying the space you invested in.

A neatly arranged driveway made of grey pavers, featuring a central strip filled with white gravel and lined with green shrubs. Modern lamp posts are evenly spaced along the strip, guiding the way to a white garage door. The image highlights elegant landscaping design and careful paving work in a residential setting.

Paving Installation Process Milton

Installation Done Right From Day One

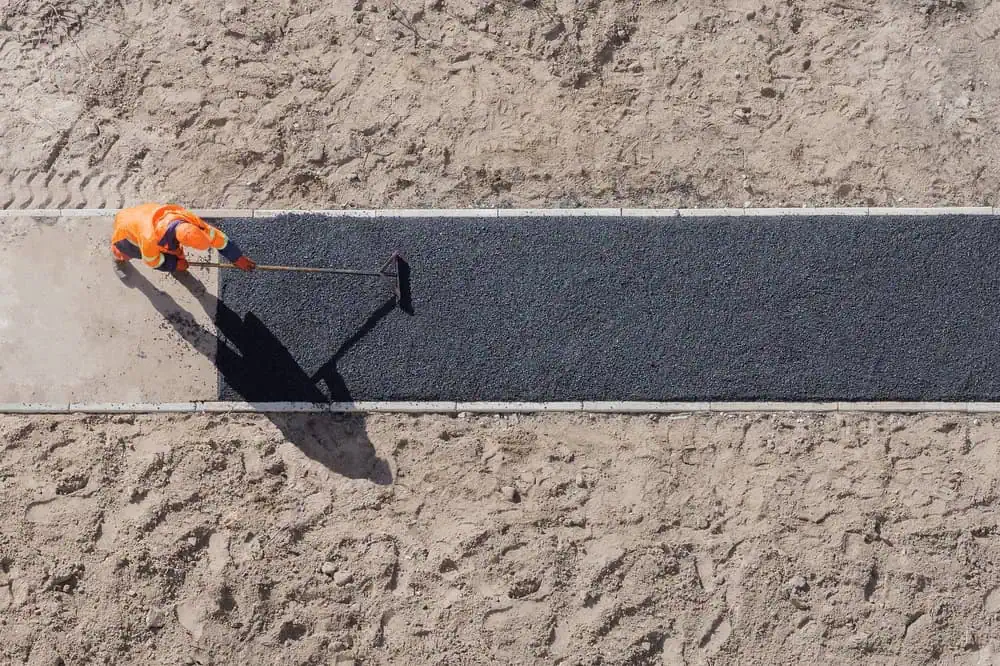
Every paver project starts with proper excavation and base preparation. This means removing the right amount of soil and creating a foundation that won’t shift or settle over time. Most paver problems trace back to shortcuts taken during this critical first step.

Next comes the base material installation and compaction. Multiple layers of crushed stone get compacted to create the stable foundation your pavers need. Proper drainage gets built in at this stage, not added as an afterthought.

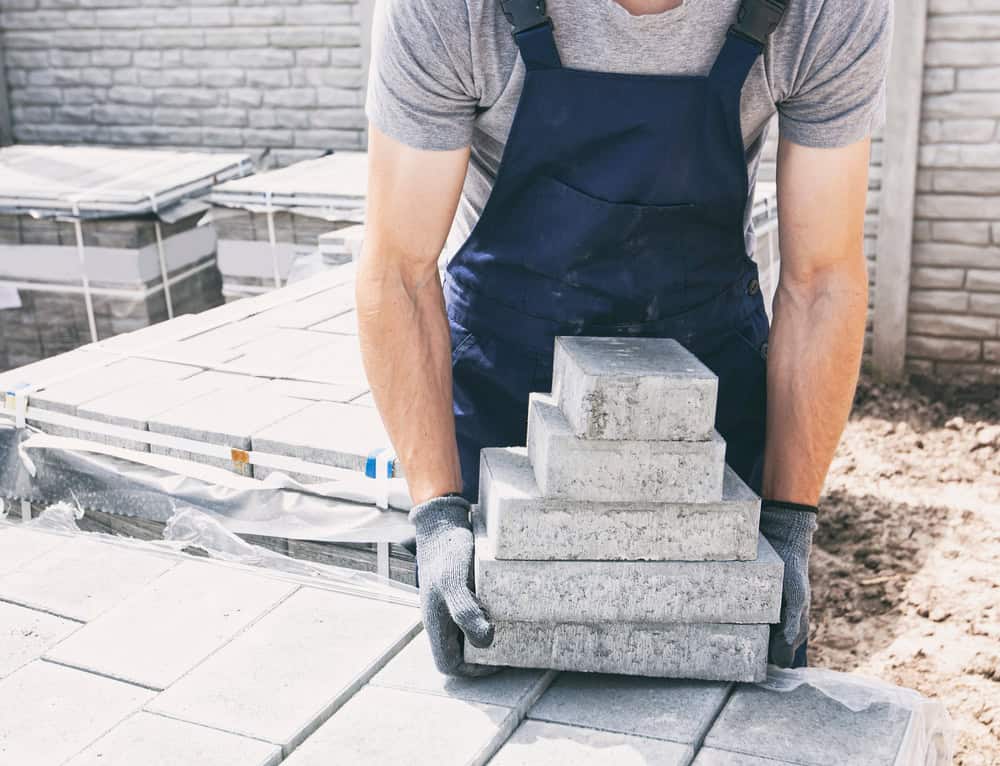
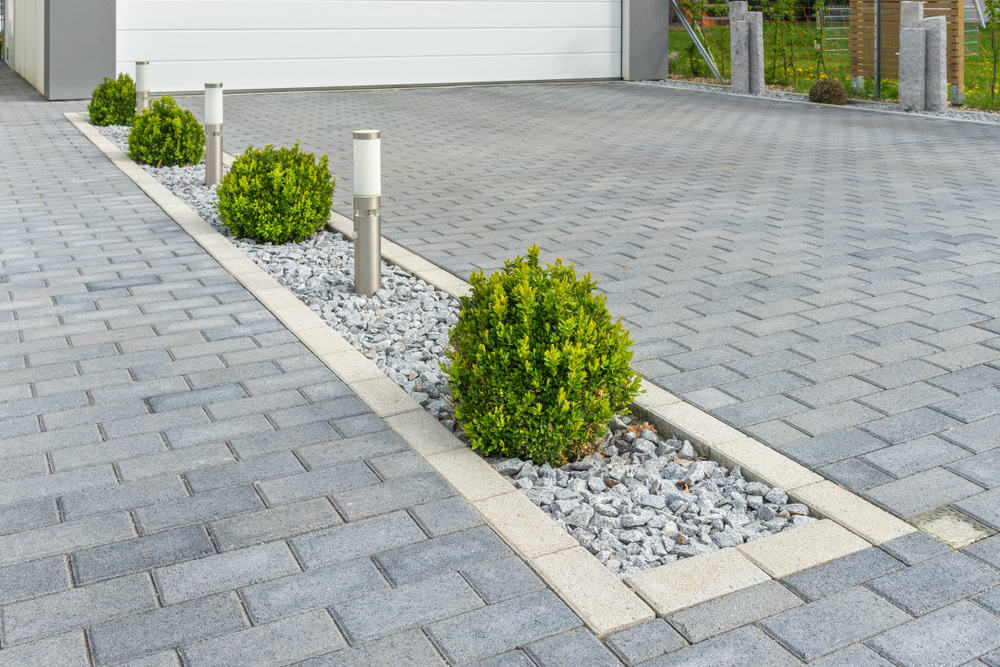
The paver installation itself involves precise leveling and spacing, followed by joint sand application and final compaction. Each step builds on the previous one, which is why rushing through any part of the process creates problems you’ll see later.

A worker in an orange safety uniform is spreading asphalt on a path in a sandy area. They are using a tool to smooth the surface, with clear, defined borders of the freshly laid asphalt. Shadows fall across the path under the sunlight.

Ready to get started?

Explore More Services

About Academy Masonry and Construction

Get a Free Consultation

Brick Paving Services Milton

Complete Paver Solutions for Your Property

Our paver installation includes everything from initial site evaluation through final cleanup. You get detailed planning that accounts for your property’s drainage patterns, existing landscaping, and how you actually want to use the space.

Material selection gets tailored to your specific needs and Milton’s climate conditions. Some pavers handle freeze-thaw cycles better than others, and some work better for high-traffic areas versus decorative spaces.

Our installation process includes proper edge restraints, joint stabilization, and surface preparation that ensures your investment performs as expected. Many Milton properties have unique challenges with drainage or soil conditions that require specific solutions during installation.

A construction worker wearing a gray shirt and blue overalls stacks concrete blocks in a step-like formation. The worker is wearing protective gloves. In the background, additional stacked bricks and a partially visible stone wall can be seen. The image highlights careful masonry work and organization of materials at a construction site.
Properly installed pavers typically last 25-30 years in New England conditions, often longer with basic maintenance. Concrete slabs usually start showing significant cracking within 5-10 years due to freeze-thaw cycles. Pavers handle temperature changes better because individual units can move slightly without creating visible cracks. When individual pavers do need replacement, you can swap them out without redoing the entire surface. This flexibility makes pavers more cost-effective long-term, especially in Milton where we see significant temperature swings throughout the year.
Professional paver installation involves proper excavation, multiple layers of compacted base material, and precise grading for drainage. Simply laying pavers on sand leads to settling, shifting, and eventual failure. The base preparation typically involves 6-8 inches of compacted crushed stone, proper edge restraints, and bedding sand that’s screeded to exact levels. This foundation prevents the movement and settling that causes uneven surfaces and trip hazards. Proper installation also includes polymeric sand in the joints, which helps lock pavers in place and prevents weed growth between stones.
Drainage gets built into every paver installation from the ground up. This starts with proper grading during excavation to direct water away from structures and toward appropriate drainage areas. The base material allows water to percolate through rather than pooling on the surface. For areas with specific drainage challenges, we can install permeable pavers or incorporate drainage systems into the base preparation. Milton’s clay soils and seasonal water table changes require careful attention to drainage details that aren’t necessary in other areas. Poor drainage is the leading cause of paver failure, so we address this during planning, not after problems appear.
Most residential paver installations take 3-5 days depending on size and complexity. Day one typically involves excavation and initial base preparation. Days two and three focus on base material installation, compaction, and fine grading. Paver installation and finishing usually happen on the final day or two. Weather can affect the timeline, especially during base preparation when compaction needs dry conditions to work properly. You’ll have access to your space immediately after completion – no waiting for materials to cure like with concrete. We’ll walk you through what to expect each day so you can plan accordingly.
Paver installation typically costs 20-40% more upfront than basic concrete, but the long-term value often makes pavers more economical. You avoid the replacement costs that come with concrete cracking and you get better property value increase. The exact cost depends on material selection, site conditions, and project complexity. Milton’s soil conditions sometimes require additional base preparation that affects pricing. Most homeowners find that the durability and repairability of pavers justify the initial investment, especially when you factor in the maintenance and replacement costs associated with concrete over time.
Properly installed pavers require minimal maintenance compared to other hardscaping options. Annual maintenance typically involves power washing and reapplying joint sand as needed. Every 2-3 years, you might want to apply a sealer to maintain color and make cleaning easier, though this isn’t required for structural integrity. Snow removal is actually easier with pavers since you can use ice melt products that would damage concrete. Individual pavers can be replaced if damaged without affecting the surrounding area. The key is proper installation – when the base is done correctly, maintenance stays simple and infrequent throughout the life of your paved area.