Pavers in Lincoln Center, MA

Pavers Built to Last Decades

Professional paver installation that handles New England weather without shifting, cracking, or settling over time.

A scenic suburban house surrounded by lush greenery, featuring a curved driveway in the foreground. The property has manicured lawns, shrubs, and trees. The house exterior is grayish with multiple gables and large windows, showcasing a well-maintained residential landscape.
A construction worker wearing a gray shirt and blue overalls stacks concrete blocks in a step-like formation. The worker is wearing protective gloves. In the background, additional stacked bricks and a partially visible stone wall can be seen. The image highlights careful masonry work and organization of materials at a construction site.

Professional Paving Installation Services

Your Outdoor Space, Done Right

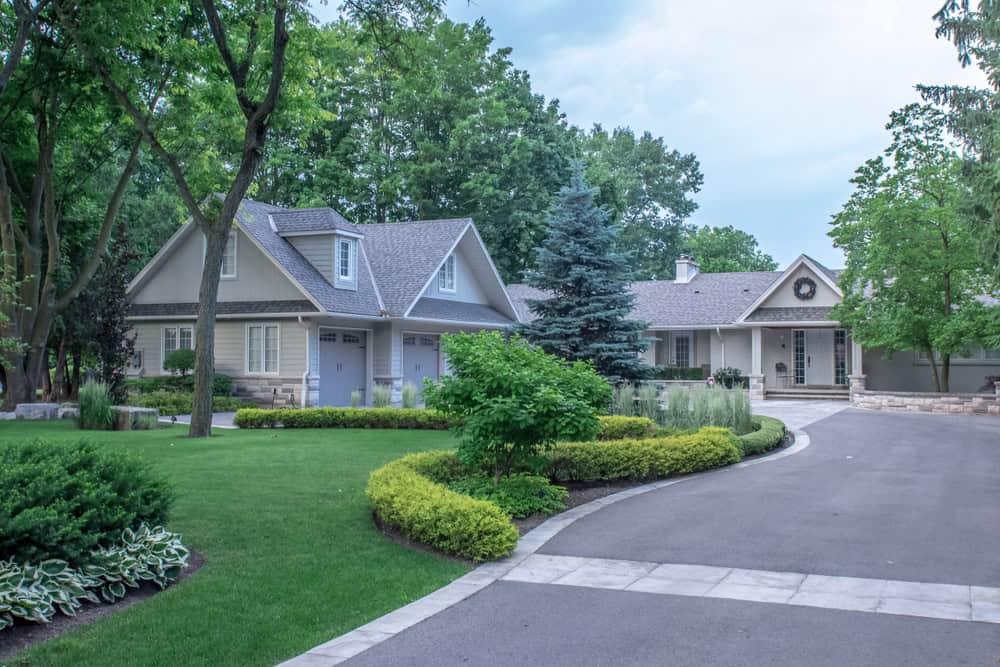
You want a patio or driveway that looks great today and still looks great in twenty years. That means proper base preparation, correct drainage, and materials that can handle Massachusetts freeze-thaw cycles without buckling or shifting.

Most paver problems happen because corners were cut during installation. When your base isn’t deep enough or your drainage isn’t right, you end up with uneven surfaces, standing water, and expensive repairs down the road.

We handle the technical details so you don’t have to worry about them. Proper excavation depth, compacted base materials, edge restraints that actually restrain, and drainage that directs water away from your foundation. The result is a paver surface that stays level and looks professional year after year.

Lincoln Center Paving Contractors

We Know New England Weather

Academy Masonry has been installing pavers throughout Lincoln Center and surrounding Massachusetts communities for years. We understand what works in this climate and what doesn’t.

Every project starts with understanding your specific site conditions. Soil type, drainage patterns, sun exposure, and how you actually use the space. This isn’t about selling you the most expensive option – it’s about recommending what makes sense for your property and budget.

We’re licensed, insured, and familiar with local building requirements. When we give you a timeline, we stick to it. When we give you a price, that’s what you pay.

A neatly arranged driveway made of grey pavers, featuring a central strip filled with white gravel and lined with green shrubs. Modern lamp posts are evenly spaced along the strip, guiding the way to a white garage door. The image highlights elegant landscaping design and careful paving work in a residential setting.

Our Paver Installation Process

Here's How Your Project Happens

First, we meet at your property to discuss what you want and assess site conditions. We’ll talk about materials, design options, and any drainage considerations specific to your yard.

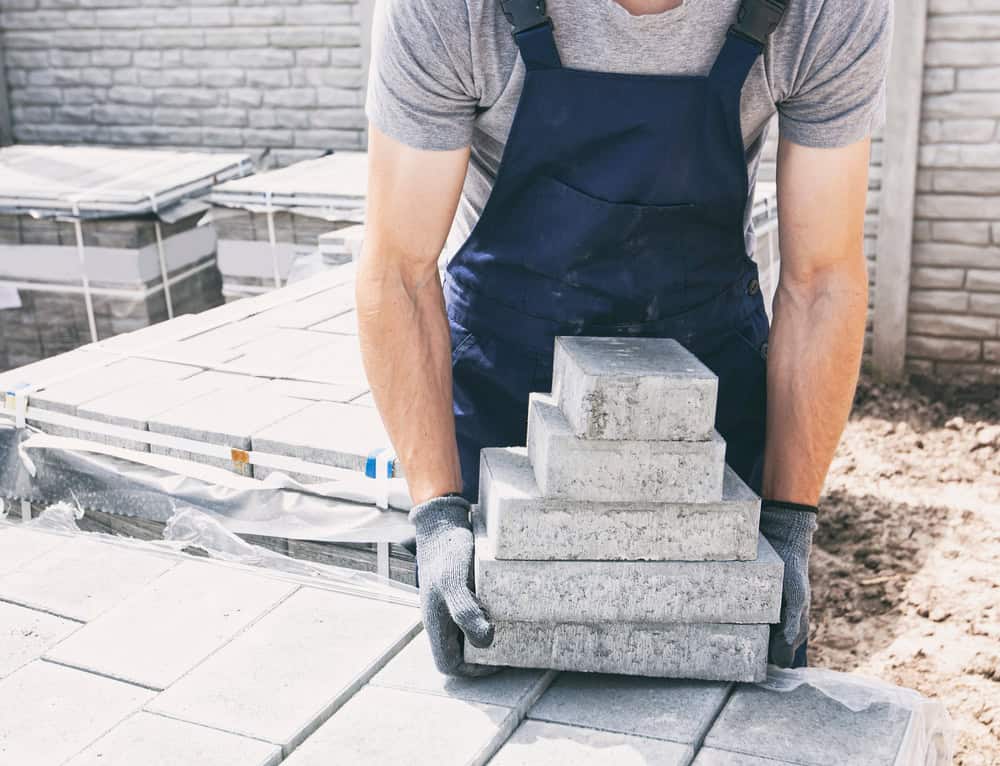
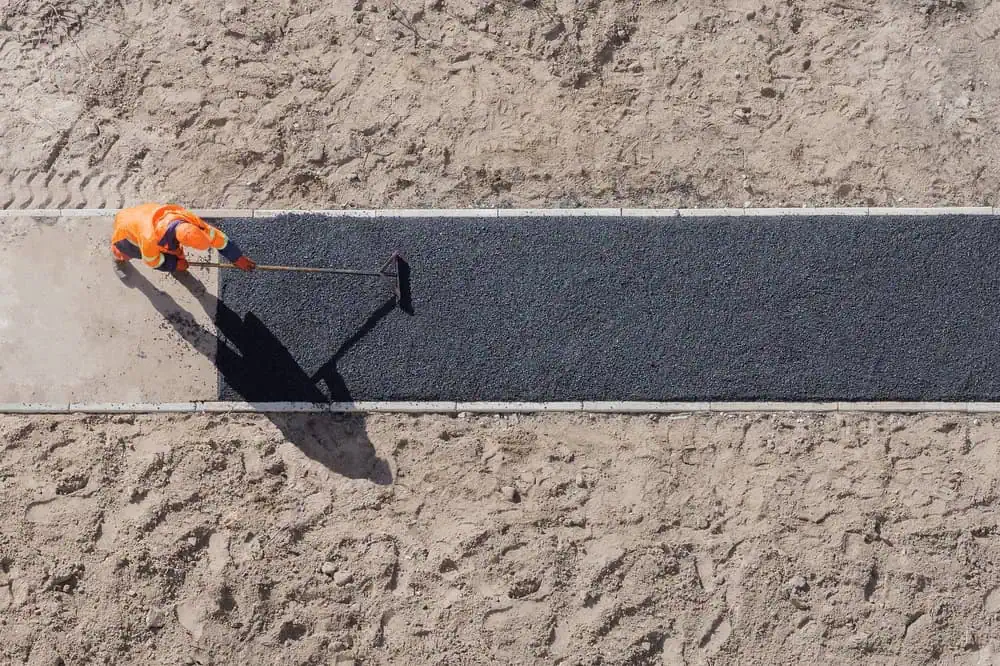
Next comes excavation and base preparation. This is the most critical part – we remove soil to the proper depth, install base materials in lifts, and compact everything to specifications. We also install edge restraints and address any drainage needs.

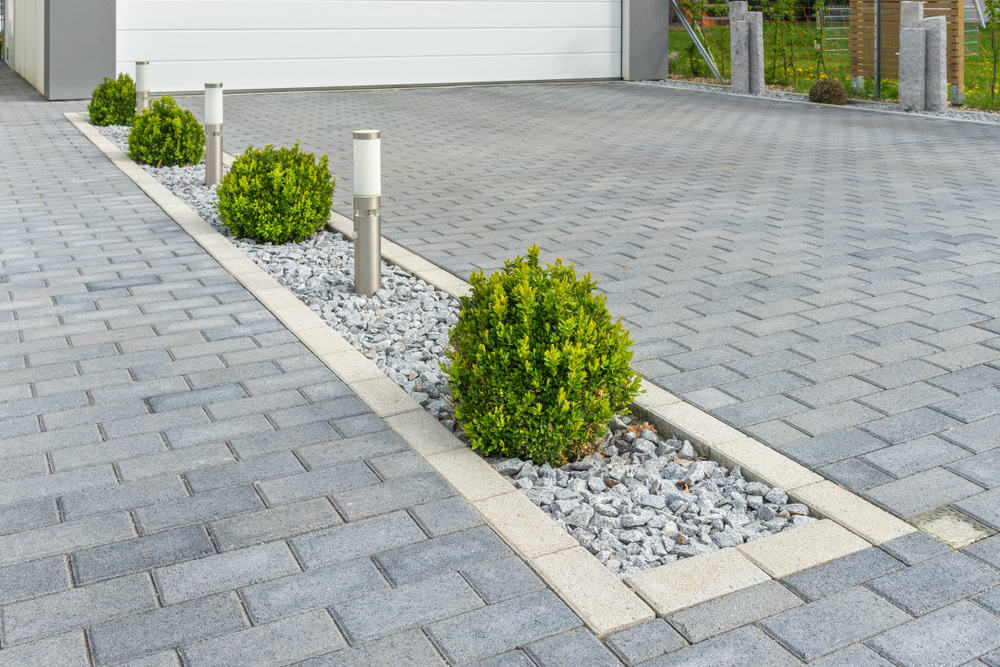
Then we set the pavers according to your chosen pattern, ensuring consistent spacing and alignment. Finally, we sweep in joint sand, compact the surface, and clean up completely. You get a detailed explanation of maintenance requirements and our warranty information.

A worker in an orange safety uniform is spreading asphalt on a path in a sandy area. They are using a tool to smooth the surface, with clear, defined borders of the freshly laid asphalt. Shadows fall across the path under the sunlight.

Ready to get started?

Explore More Services

About Academy Masonry and Construction

Get a Free Consultation

Patio Pavers and Driveway Installation

What's Included in Every Project

Every paver installation includes proper excavation, base preparation with crushed stone, edge restraints, and professional-grade joint sand. We handle all the technical requirements so your pavers perform correctly.

You’ll also get guidance on material selection based on your specific needs. Different pavers work better for different applications, and we’ll explain the pros and cons of each option without pushing you toward the most expensive choice.

We coordinate any necessary permits and ensure compliance with local requirements. Our work area stays organized throughout the project, and we protect existing landscaping and structures. When we’re finished, your property is cleaner than when we started.

A construction worker wearing a gray shirt and blue overalls stacks concrete blocks in a step-like formation. The worker is wearing protective gloves. In the background, additional stacked bricks and a partially visible stone wall can be seen. The image highlights careful masonry work and organization of materials at a construction site.
Properly installed pavers can last 25-50 years or more with minimal maintenance. The key is correct base preparation and drainage. When pavers are installed over a properly compacted base with adequate drainage, they handle freeze-thaw cycles without shifting or settling. Most paver failures happen because the installation was rushed or the base wasn’t prepared correctly. Quality installation costs more upfront but saves money over decades by avoiding repairs and replacements.
Concrete pavers are manufactured to precise dimensions and come in many colors and textures. They’re typically more affordable and offer consistent sizing for easier installation. Brick pavers are made from fired clay and offer a traditional appearance with natural color variation. Both work well in Massachusetts climate when properly installed. Concrete pavers tend to be more popular for driveways due to their strength and uniformity, while brick pavers are often chosen for patios and walkways for their classic appearance.
Proper edge restraints and base preparation prevent paver movement. We install rigid edge restraints along all perimeter areas and use adequate base depth for the intended load. The base gets compacted in lifts to achieve proper density. Joint sand between pavers also helps lock them together. Many shifting problems occur when edge restraints are inadequate or the base wasn’t compacted properly. We use commercial-grade materials and follow industry standards for base preparation to ensure long-term stability.
It depends on the condition of the existing surface and drainage considerations. If the concrete is level, structurally sound, and has proper drainage, pavers can sometimes be installed over it with appropriate base modifications. However, if there are cracks, settling, or drainage issues, it’s usually better to remove the old surface completely. Installing over compromised surfaces often leads to problems later. We evaluate each situation individually and recommend the approach that will give you the best long-term results.
Pavers need minimal maintenance compared to other surfaces. Occasional sweeping and rinsing with water handles most cleaning needs. Joint sand may need replenishment every few years, especially after heavy rains. Sealing is optional but can enhance color and make cleaning easier. If individual pavers get damaged, they can be replaced without affecting surrounding areas. Weeds between joints can be controlled with polymeric sand or occasional spot treatment. Overall, pavers require less maintenance than concrete or asphalt surfaces.
Most residential paver projects take 3-7 days depending on size and complexity. A standard patio might take 3-4 days, while a large driveway could take a week. Weather can affect timing, especially during excavation and base work. We provide realistic timelines during the estimate process and keep you updated if conditions change. The base preparation and compaction phases can’t be rushed – they’re critical for long-term performance. We’d rather take an extra day to do things right than rush and create problems later.