Pavers in Hyde Park, MA

Outdoor Spaces That Actually Last

Professional paver installation that handles New England weather and looks great for decades.

A scenic suburban house surrounded by lush greenery, featuring a curved driveway in the foreground. The property has manicured lawns, shrubs, and trees. The house exterior is grayish with multiple gables and large windows, showcasing a well-maintained residential landscape.
A construction worker wearing a gray shirt and blue overalls stacks concrete blocks in a step-like formation. The worker is wearing protective gloves. In the background, additional stacked bricks and a partially visible stone wall can be seen. The image highlights careful masonry work and organization of materials at a construction site.

Professional Paving Installation Services

What You Get With Quality Pavers

You get an outdoor space you actually want to use. No more looking at that cracked concrete patio or muddy backyard and thinking “someday we’ll fix that.”

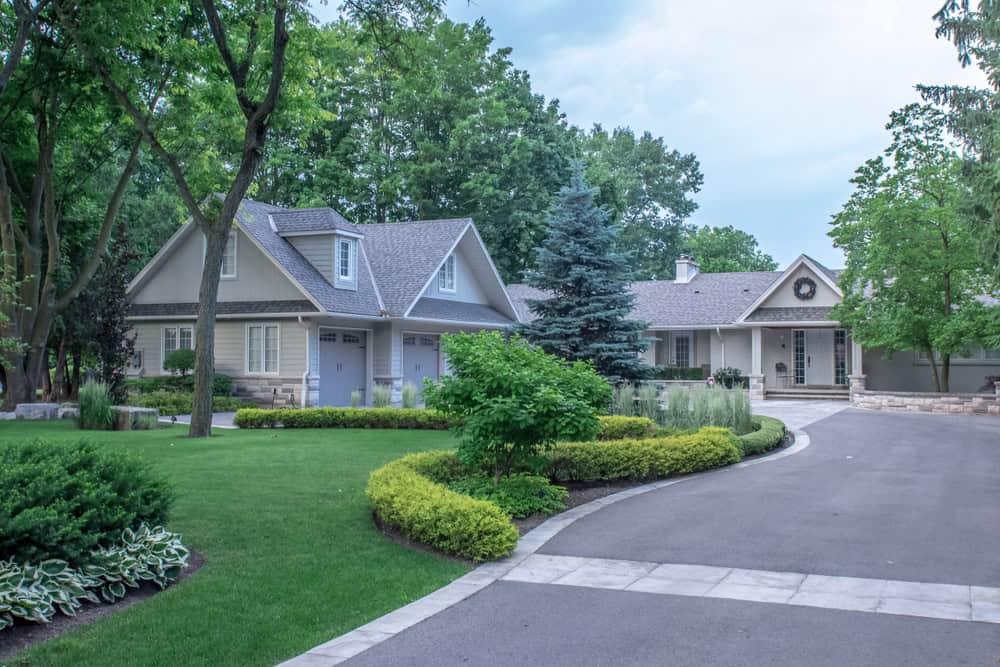
Professional paver installation means your patio becomes the place where you have morning coffee, host summer barbecues, and actually enjoy being outside. The pavers stay level, the joints stay tight, and the whole thing looks as good in year ten as it did on day one.

Your property value goes up too. Quality hardscaping isn’t just about today – it’s an investment that pays back when well-installed pavers become a selling point instead of something you have to explain away.

Hyde Park Paving Contractors

We Know Hyde Park Soil

Academy Masonry has been installing pavers in Hyde Park and surrounding areas for years. We understand the soil conditions here, the drainage challenges that come with New England weather, and what it takes to build hardscaping that lasts.

We’re not the crew that shows up, throws down some pavers, and disappears. We do the base work right, handle the grading properly, and make sure your project is something you’ll be happy with for decades.

You’ll work with the same team from estimate to completion. No subcontractors, no surprises, no wondering who’s actually doing the work.

A neatly arranged driveway made of grey pavers, featuring a central strip filled with white gravel and lined with green shrubs. Modern lamp posts are evenly spaced along the strip, guiding the way to a white garage door. The image highlights elegant landscaping design and careful paving work in a residential setting.

Paver Installation Process

How We Install Pavers Right

First, we evaluate your space and talk through what you want. No high-pressure sales pitch – just a conversation about your goals, timeline, and budget.

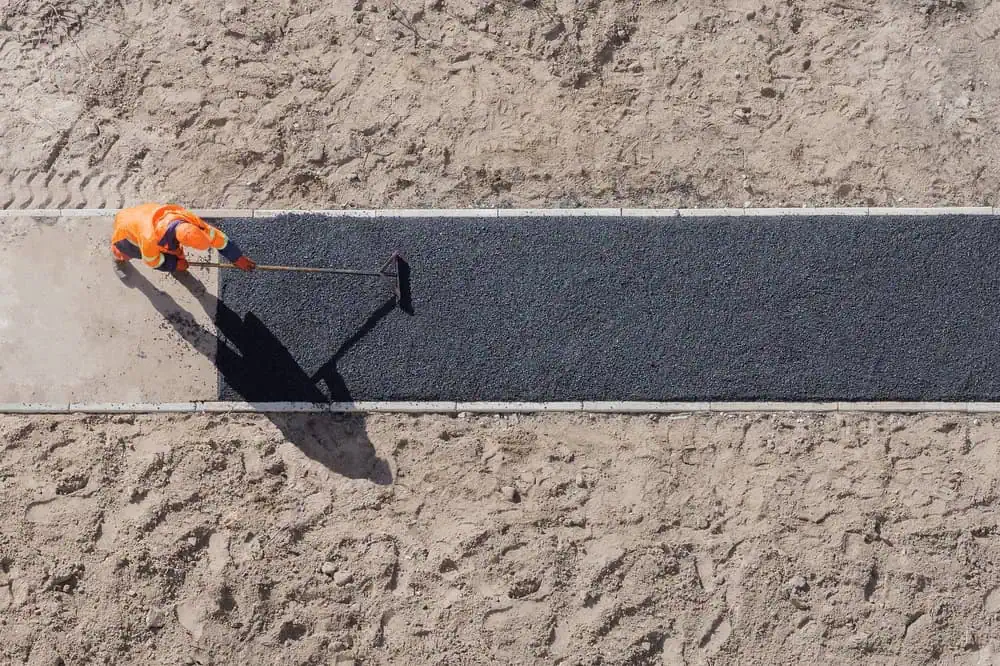
Next comes the real work: proper excavation and base preparation. This is where most paver jobs succeed or fail. We dig to the right depth, install proper drainage, and create a stable base using the right materials for Hyde Park soil conditions.

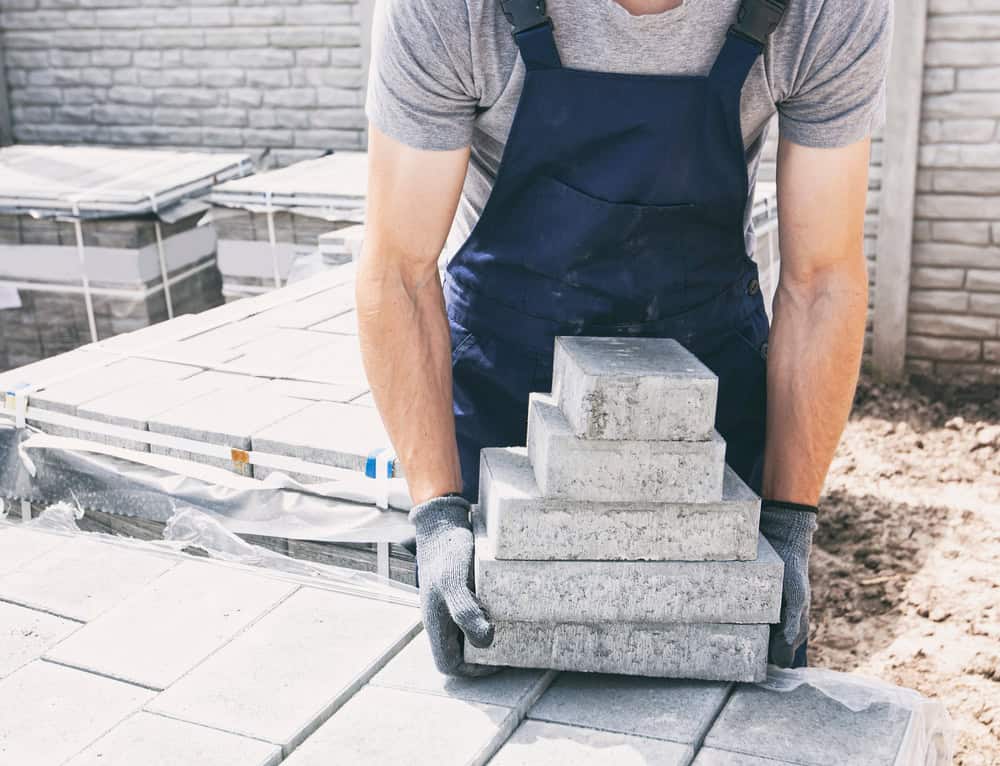
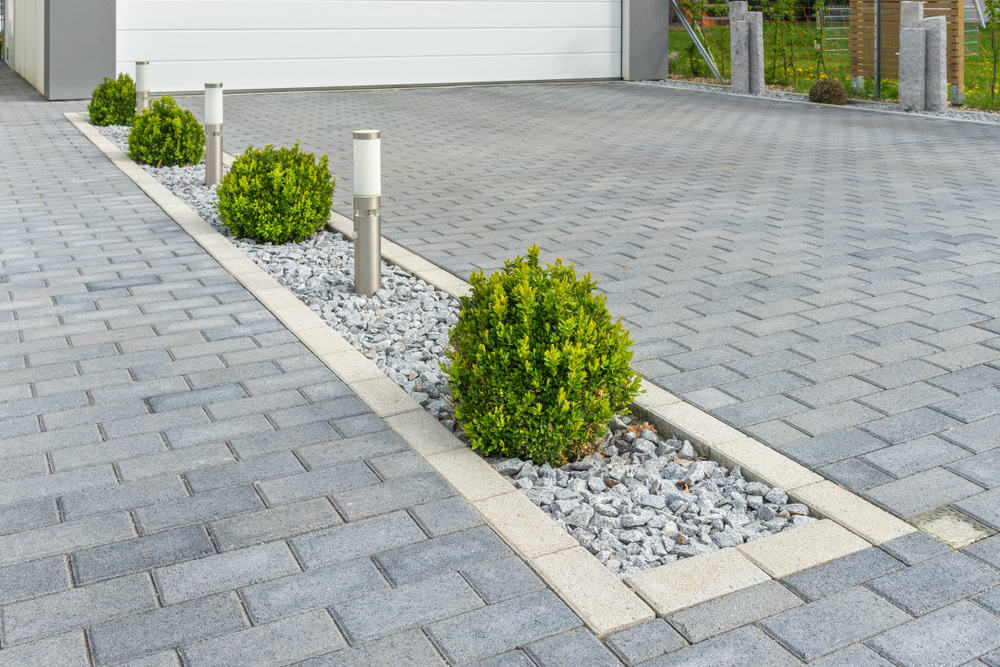
Then we install your pavers with precise leveling and proper joint spacing. Every paver gets checked, adjusted, and locked into place. We finish with edge restraints and joint sand that keeps everything tight and stable.

You get a final walkthrough where we explain maintenance (spoiler: there’s not much) and answer any questions. The whole process typically takes 3-5 days depending on project size.

A worker in an orange safety uniform is spreading asphalt on a path in a sandy area. They are using a tool to smooth the surface, with clear, defined borders of the freshly laid asphalt. Shadows fall across the path under the sunlight.

Ready to get started?

Explore More Services

About Academy Masonry and Construction

Get a Free Consultation

Patio Pavers and Hardscaping

What's Included In Your Project

Every paver installation includes proper excavation, base preparation with crushed stone, landscape fabric, and precise grading for drainage. We handle permits if needed and protect your existing landscaping during construction.

You get your choice of paver styles, colors, and patterns. We work with quality suppliers and can show you options that complement your home’s architecture and your personal style. Brick pavers, concrete pavers, natural stone – whatever fits your vision and budget.

The installation includes edge restraints, polymeric joint sand, and a thorough cleanup. We also provide maintenance instructions and warranty information so you know exactly how to keep your new pavers looking great.

Most Hyde Park projects involve working around existing landscaping, sprinkler systems, or drainage issues. We handle these challenges as part of the job, not as expensive extras that surprise you later.

A construction worker wearing a gray shirt and blue overalls stacks concrete blocks in a step-like formation. The worker is wearing protective gloves. In the background, additional stacked bricks and a partially visible stone wall can be seen. The image highlights careful masonry work and organization of materials at a construction site.
Quality pavers installed with proper base preparation easily last 20-30 years or more in Massachusetts. The key is the installation – pavers themselves are incredibly durable, but they need a stable foundation that accounts for freeze-thaw cycles. When we excavate to the right depth, install proper drainage, and use the correct base materials, your pavers will handle New England winters without shifting, cracking, or settling. Most paver failures happen because corners were cut during installation, not because the pavers themselves failed.
The difference is in the base work you can’t see. Cheap installations skip proper excavation depth, use inadequate base materials, or ignore drainage requirements. This saves money upfront but leads to settling, shifting, and expensive repairs within a few years. Professional installation means excavating to the right depth (usually 8-12 inches total), installing proper drainage, using the right base materials in the right amounts, and taking time to level everything correctly. You pay more initially, but you get pavers that stay level and look good for decades instead of needing major repairs in 3-5 years.
Paver installation typically runs $15-25 per square foot for quality work in the Hyde Park area, depending on the complexity of your project and paver selection. A typical 300 square foot patio runs $4,500-7,500 including materials and professional installation. Factors that affect cost include excavation requirements, drainage needs, paver style, and site access. We provide detailed written estimates that break down materials, labor, and any site-specific requirements so you know exactly what you’re paying for. Cheaper quotes usually mean corners will be cut somewhere – either in materials, base preparation, or installation quality.
Most paver patios and walkways don’t require permits in Hyde Park, but larger projects or those affecting drainage might need approval. We handle permit research and applications when needed as part of our service. The key factors are project size, proximity to property lines, and whether we’re changing existing drainage patterns. We’ll let you know during the estimate if permits are required and take care of the paperwork. It’s always better to check than assume – unpermitted work can create problems when you sell your home or if neighbors complain.
Properly installed pavers need very little maintenance. You’ll occasionally need to add polymeric sand to joints if it washes out over time, and periodic cleaning with a hose or pressure washer keeps them looking fresh. Sealing is optional but can enhance color and make cleaning easier – most homeowners seal every 3-5 years if they choose to seal at all. Snow removal is easy since pavers handle salt and ice melt without damage. The biggest maintenance issue is usually weeds growing in joints, which proper installation and quality joint sand largely prevent. Overall, pavers require less maintenance than concrete patios or wooden decks.
Sometimes, but it depends on the condition of your existing concrete and proper height considerations. The concrete needs to be structurally sound, properly sloped for drainage, and at a height that allows for pavers plus base material without creating problems with door thresholds or drainage. Installing over concrete can save excavation costs, but it’s not always the best long-term solution. We evaluate each situation individually and recommend the approach that gives you the best results. Sometimes removal and proper installation from scratch is worth the extra cost for long-term performance and proper drainage.