Pavers in Framingham Center, MA

Outdoor Spaces That Actually Last

Professional paver installation that handles New England weather without cracking, shifting, or settling over time.

A scenic suburban house surrounded by lush greenery, featuring a curved driveway in the foreground. The property has manicured lawns, shrubs, and trees. The house exterior is grayish with multiple gables and large windows, showcasing a well-maintained residential landscape.
A construction worker wearing a gray shirt and blue overalls stacks concrete blocks in a step-like formation. The worker is wearing protective gloves. In the background, additional stacked bricks and a partially visible stone wall can be seen. The image highlights careful masonry work and organization of materials at a construction site.

Professional Paving Installation Services

Your Outdoor Space, Done Right

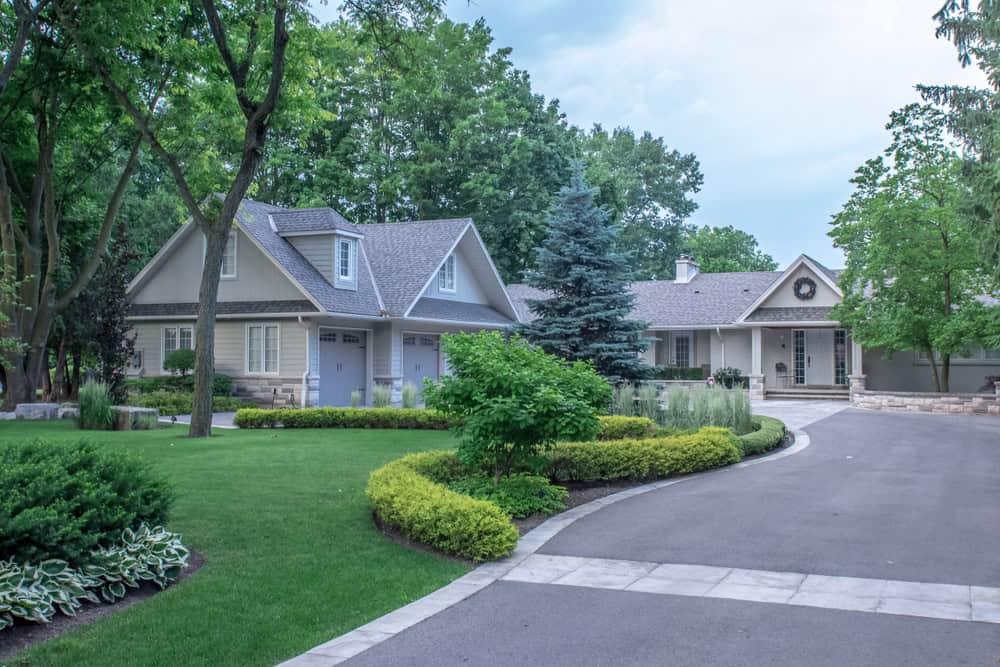
You get a patio, walkway, or driveway that looks great year one and still looks great year ten. No more dealing with cracked concrete or uneven surfaces that become trip hazards.

Our paver installations handle Massachusetts freeze-thaw cycles because we build the foundation right from day one. Proper base preparation, correct drainage, and quality materials mean your investment stays beautiful and functional.

You’ll have outdoor space you actually want to use. Whether that’s entertaining guests, enjoying morning coffee, or just having a clean path to your front door that doesn’t puddle or crack.

Framingham Center Paving Contractors

We Know This Area

Academy Masonry has been handling paver installations in Framingham Center and surrounding areas for years. We understand local soil conditions, drainage challenges, and what materials work best in our climate.

You’re working with contractors who live and work in this community. We know which suppliers provide the best materials, understand local building requirements, and have relationships with the inspectors and permitting offices.

Our reputation here matters to us. That’s why we focus on doing the job right the first time rather than cutting corners to win on price alone.

A neatly arranged driveway made of grey pavers, featuring a central strip filled with white gravel and lined with green shrubs. Modern lamp posts are evenly spaced along the strip, guiding the way to a white garage door. The image highlights elegant landscaping design and careful paving work in a residential setting.

Paver Installation Process

Here's What Actually Happens

We start with a site visit to assess your space, discuss your vision, and identify any drainage or grading issues that need attention. You’ll get a clear estimate that covers materials, labor, and timeline.

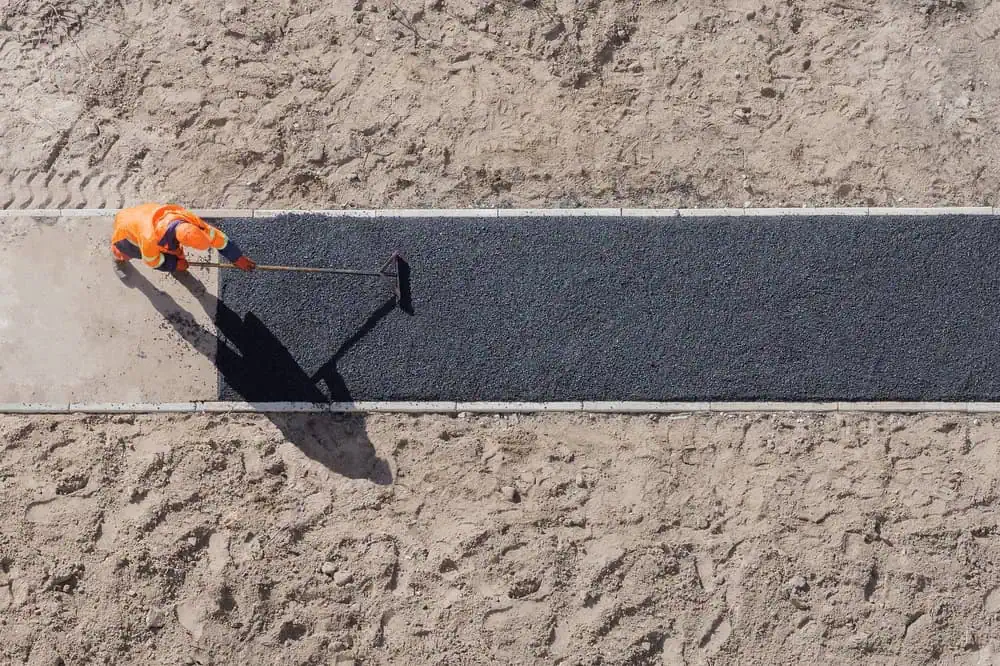
Once you approve the project, we handle permits if needed and schedule the work. We excavate to proper depth, install a solid base with appropriate drainage, and set pavers with correct spacing and alignment.

The final step involves joint sand application, compaction, and cleanup. You get a walkthrough to ensure everything meets your expectations before we consider the job complete. Most installations take 2-4 days depending on size and complexity.

A worker in an orange safety uniform is spreading asphalt on a path in a sandy area. They are using a tool to smooth the surface, with clear, defined borders of the freshly laid asphalt. Shadows fall across the path under the sunlight.

Ready to get started?

Explore More Services

About Academy Masonry and Construction

Get a Free Consultation

Patio Pavers and Walkway Options

What You Get With Us

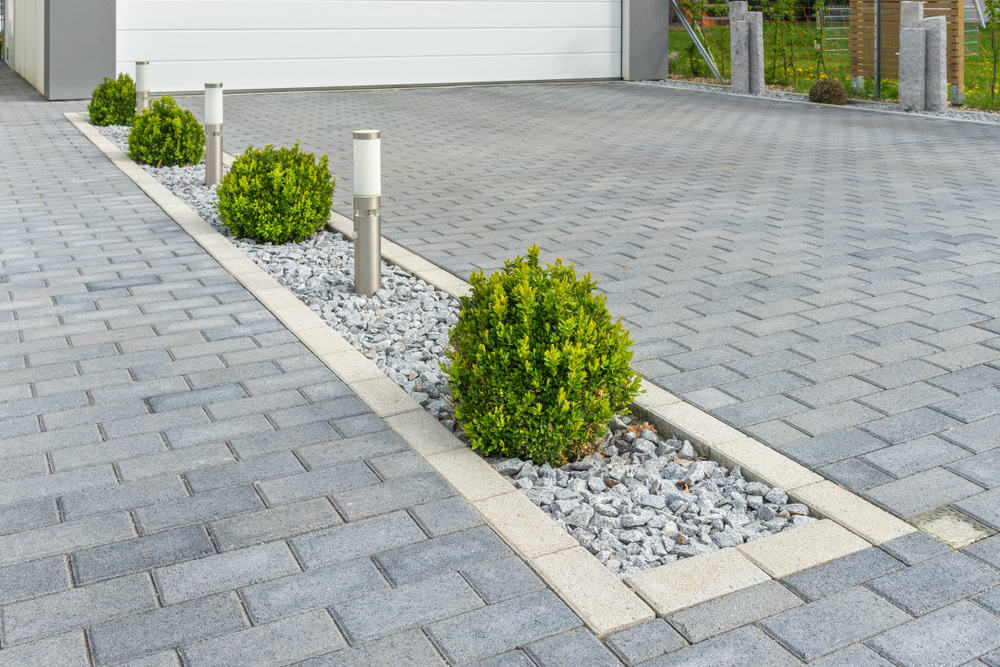
Every paver installation includes proper excavation, base preparation with crushed stone, landscape fabric, and sand leveling. We handle drainage considerations specific to your property and local conditions.

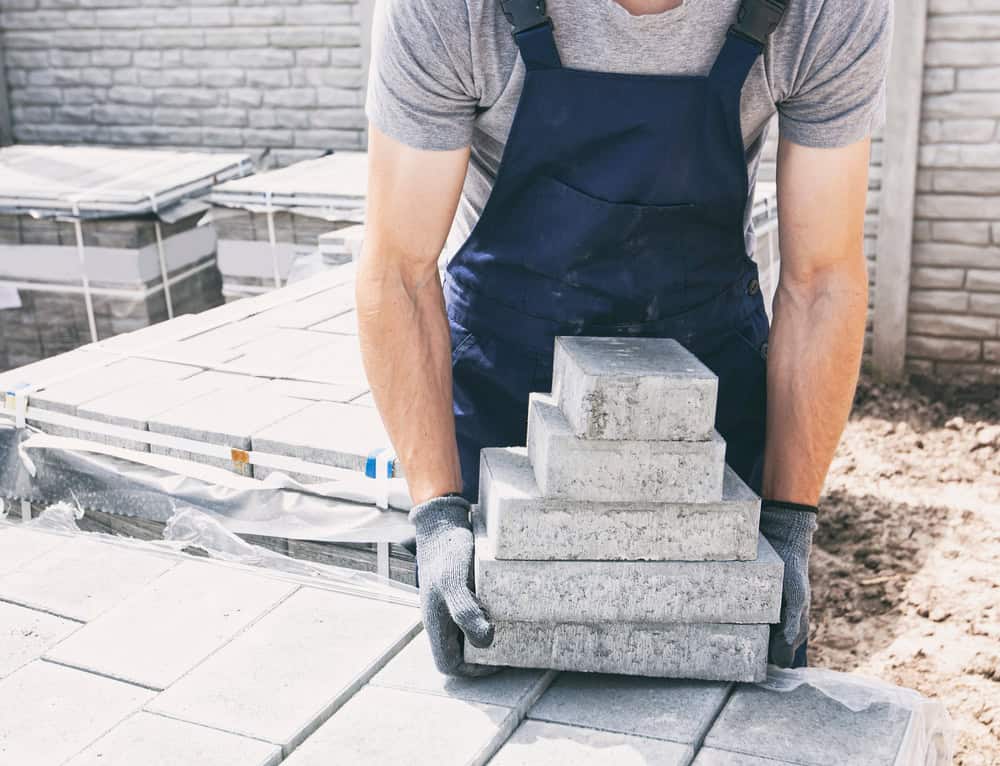
You choose from brick pavers, concrete pavers, or natural stone options that complement your home’s style. We’ll explain the pros and cons of each material so you can make an informed decision based on your budget and preferences.

Our installations include edge restraints to prevent spreading, proper joint sand application, and initial compaction. You also get guidance on maintenance and care to keep your pavers looking their best for years to come.

A construction worker wearing a gray shirt and blue overalls stacks concrete blocks in a step-like formation. The worker is wearing protective gloves. In the background, additional stacked bricks and a partially visible stone wall can be seen. The image highlights careful masonry work and organization of materials at a construction site.
Well-installed pavers can last 20-30 years or more in Massachusetts climate. The key is proper base preparation and drainage. Pavers actually handle freeze-thaw cycles better than poured concrete because individual units can move slightly without cracking. If a paver does get damaged, you can replace individual pieces rather than tearing up the entire surface. The longevity really depends on the quality of installation – proper excavation depth, adequate base material, and correct drainage are essential for long-term performance.
Brick pavers are made from fired clay and offer a classic, traditional look that ages well over time. They’re naturally slip-resistant and maintain their color without fading. Concrete pavers offer more variety in colors, shapes, and textures, and they’re typically more affordable. Both materials are durable, but brick pavers tend to be slightly more expensive upfront. Concrete pavers can sometimes fade over time, especially lighter colors, but they’re easier to replace if needed. Your choice often comes down to aesthetic preference and budget considerations.
Proper drainage is critical for any paver installation, especially in Massachusetts where we get significant rainfall and snow melt. We grade the base to direct water away from foundations and create proper slope for surface drainage. The base includes crushed stone that allows water to percolate through rather than pooling on top. We also install edge drains when necessary and ensure water has a clear path away from the paved area. Poor drainage is the number one cause of paver failure, so we take this aspect seriously in our planning and installation process.
In some cases, yes, but it depends on the condition of the existing concrete and proper height considerations. The concrete needs to be structurally sound, properly sloped for drainage, and not have significant cracks or settling issues. Installing pavers over concrete will raise the surface height, which can create issues with door thresholds, steps, and drainage patterns. Often it’s better to remove the old concrete and start fresh to ensure proper base preparation and drainage. We’ll assess your specific situation and recommend the best approach for long-term success.
Pavers are relatively low-maintenance compared to other outdoor surfaces. Regular sweeping and occasional power washing keep them looking clean. You’ll need to add joint sand every few years as it naturally washes out over time. Sealing is optional but can help protect against stains and enhance color – typically every 3-5 years depending on traffic and weather exposure. Weeds can grow in joints if sand levels get low, but proper maintenance prevents this issue. Individual pavers can be replaced if damaged, which is a major advantage over concrete slabs that require complete replacement when problems occur.
Paver installation typically costs more upfront than poured concrete, usually 20-40% higher depending on the materials chosen. However, pavers often provide better long-term value because they’re more durable, easier to repair, and add more to property value. Concrete can crack and require complete replacement, while individual pavers can be replaced as needed. The cost difference also depends on the complexity of the design, site conditions, and material choices. We provide detailed estimates that break down material and labor costs so you can make an informed decision based on your budget and long-term goals.